What is Meta Prompting? A Guide to Designing Reusable Prompts
Prompts shape every interaction with a large language model. Clear instructions produce focused, useful responses, while vague ones often lead to inconsistent results. This becomes harder when teams need the same task completed repeatedly in a fixed format, tone, or structure.
Meta-prompting asks the model to design a reusable prompt, template, checklist, or workflow before completing the task. In this article, we’ll explore how it improves consistency, scalability, and prompt quality.
Meta-prompting is a technique where one prompt is used to create, improve, or control another prompt. In simple terms, it means prompting the model to become a prompt designer.
In normal prompting, you directly ask the model to complete a task. For example:
“Write an article on AI agents.”
In meta-prompting, you ask the model to first create the best prompt for that task. For example:
“Create a reusable prompt that can help an AI model write high-quality articles on AI topics.”
The output of a meta-prompt is usually not the final answer. It can be a prompt template, system instruction, set of rules, checklist, rubric, or structured workflow that can be reused for similar tasks.
This is useful when you want consistency across many outputs. Instead of writing a new prompt every time, you create a strong reusable prompt structure once and use it across multiple tasks.
Meta-prompting works by adding an extra layer before the final task. Instead of directly asking the model to produce the final output, we first ask it to create the right prompt, template, or instruction set for that output.
A simple meta-prompting workflow has four steps.
- Define the goal: Clearly state what the final prompt should help the model produce, such as a customer feedback summary, Python code, a blog article, or a business report.
- Add constraints: Specify the tone, audience, length, structure, tools, examples, formatting rules, and anything the model should avoid.
- Generate a reusable prompt: Ask the model to create a clear prompt with instructions and placeholders that can be adapted for different inputs.
- Test and refine: Try the generated prompt on real examples. If the results are unsatisfactory, improve the meta-prompt and repeat the process.
This makes prompting more systematic. You are not just hoping for a good answer. You are designing a prompt workflow that can be tested, improved, and reused.
A meta-prompt does not have to be complicated. A good meta-prompt usually includes the task, the goal, the constraints, the expected format, and a way to check the final output.
Here is a simple reusable template:
Act as an expert prompt designer.Create a reusable prompt for the following task:
Task:
[Describe the task]The prompt should follow these requirements:
Audience:
[Who the output is for]Tone:
[Formal, simple, technical, friendly, etc.]Length:
[Short, detailed, 500 words, etc.]Output format:
[Paragraph, table, JSON, bullet points, report, etc.]Must include:
[Important points]Must avoid:
[Things the model should not do]Return:
System instructions
User prompt template with placeholders
A short checklist to validate the output
This template helps the model create a prompt that can be reused for similar tasks. The checklist is important because it gives a simple way to verify whether the output follows the expected rules.
Let us understand meta-prompting with a simple example.
Suppose you want to write articles on different AI topics. A normal prompt would be:
“Write an article on AI agents.”
This may give you one article, but the structure may change every time. One article may have examples, another may not. One may include FAQs, while another may miss them completely.
Now, instead of asking the model to write the article directly, we use meta-prompting.
Step 1: Write the Meta-Prompt
Act as an expert prompt designer.Create a reusable prompt that helps an AI model write beginner-friendly articles on AI topics.
The article should include:
• A short introduction
• Simple explanation of the topic
• Practical examples
• Use cases
• Comparison with related concepts
• Best practices
• Common mistakes
• Conclusion
• FAQsKeep the tone simple, educational, and practical.
Also include a checklist to validate whether the final article is complete.
Step 2: Model Generates a Reusable Prompt
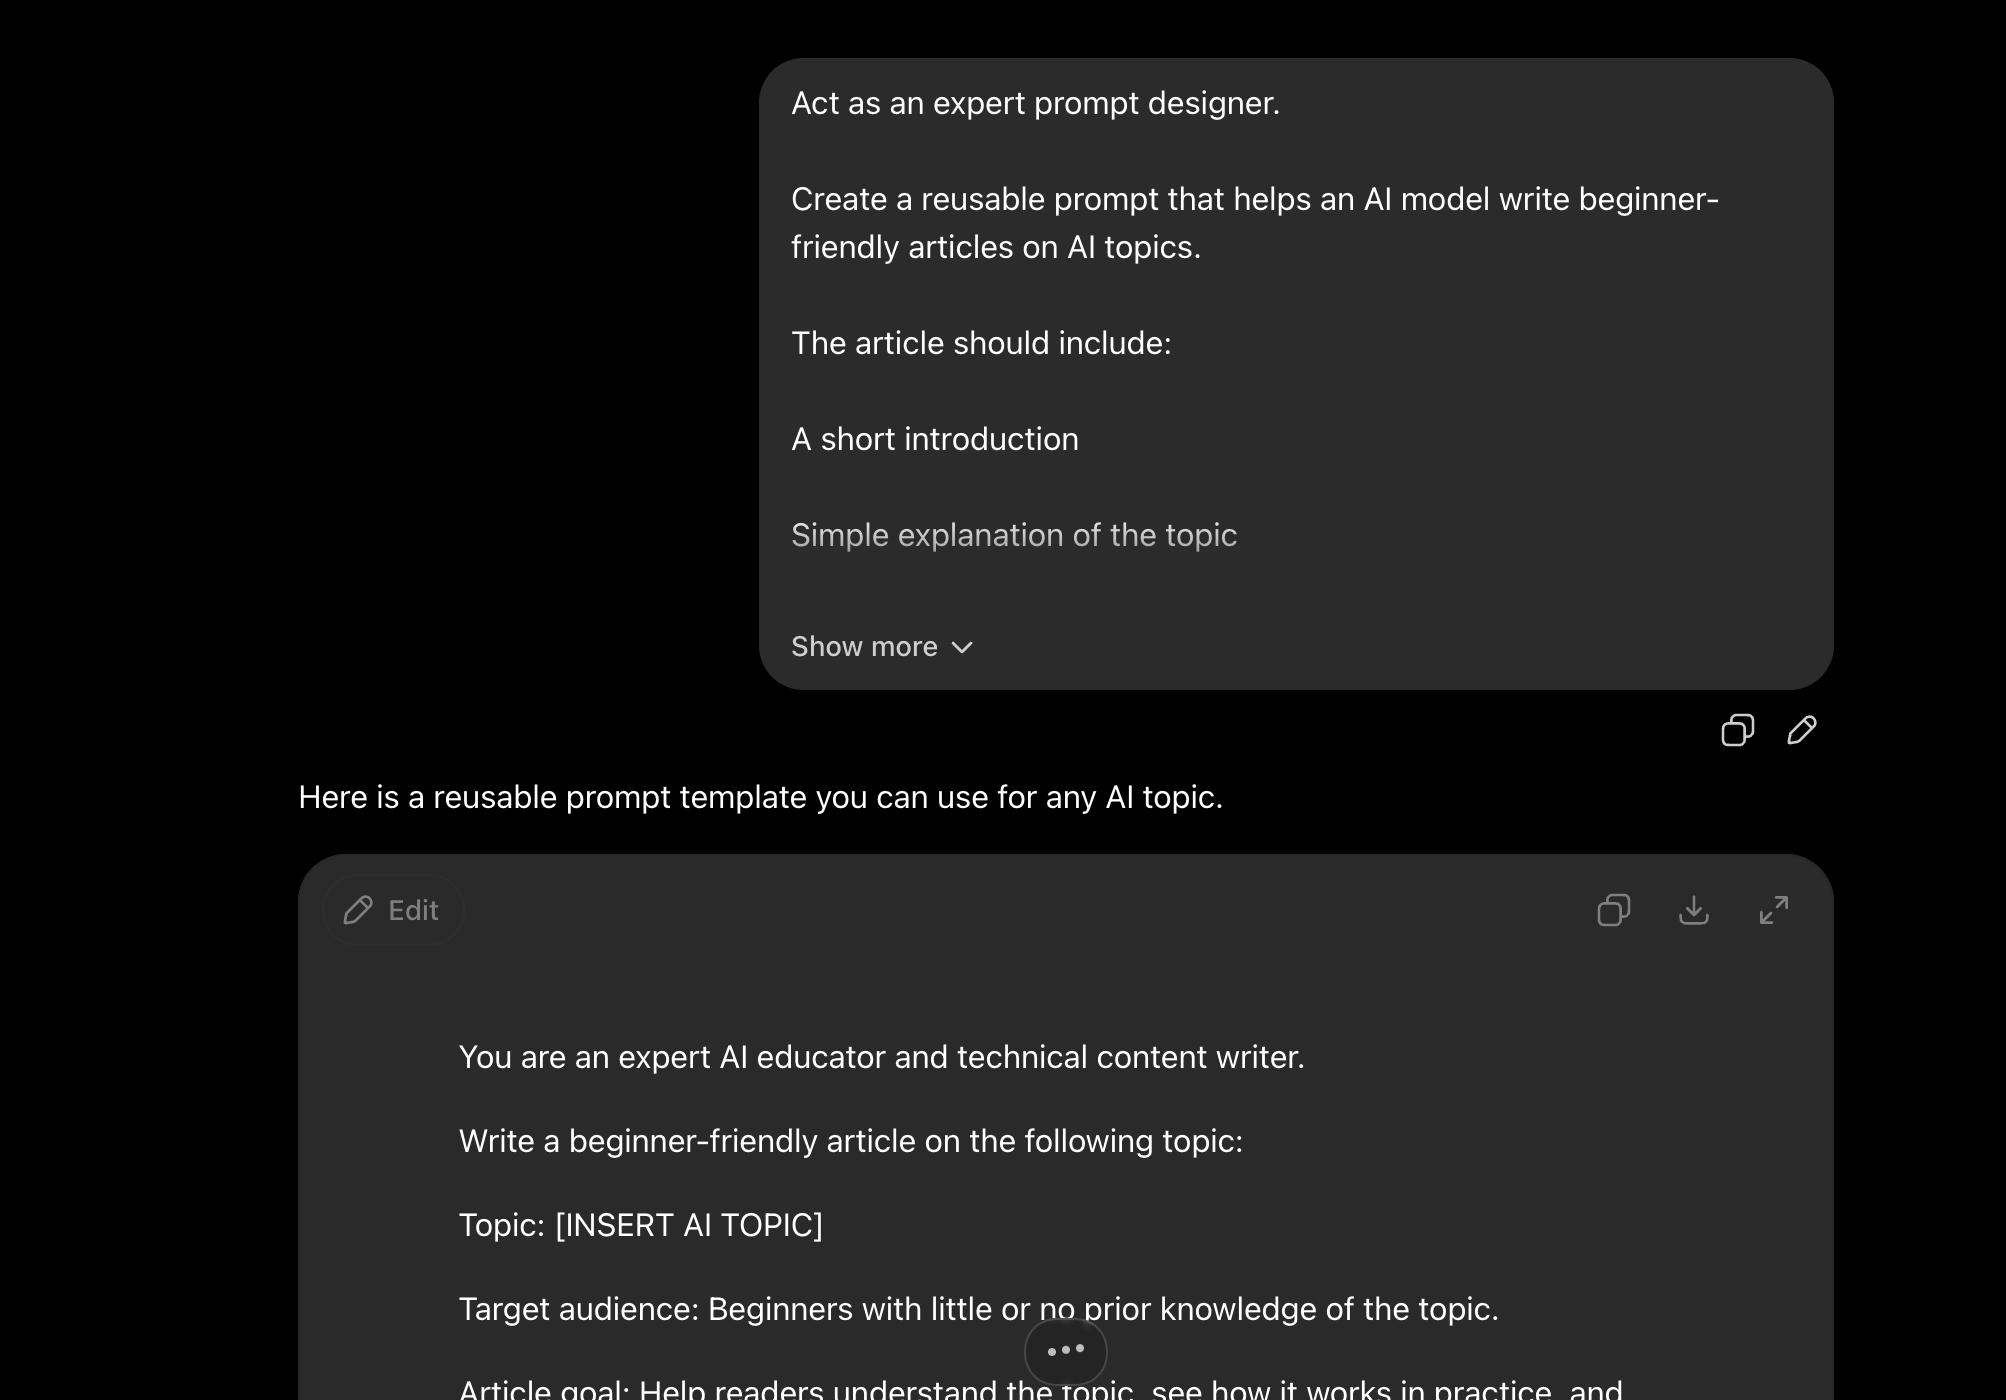
The model generates a prompt like this:
You are an expert AI educator and technical content writer.Write a beginner-friendly article on the following topic:
Topic: [INSERT AI TOPIC]
Target audience: Beginners with little or no prior knowledge of the topic.
Article goal: Help readers understand the topic, see how it works in practice, and learn when and how to use it.
Use a simple, educational, and practical tone. Explain technical terms using plain language. Avoid unnecessary jargon, overly academic explanations, and complex mathematical details. When a technical term is necessary, define it immediately.
Use clear headings, short paragraphs, examples, bullet points, and tables where they improve readability.
The article should follow this structure:
[Create a Clear and Engaging Title]
Introduction
Write a short introduction that:
• Introduces the topic
• Explains why it is useful or important
• Tells the reader what they will learn
• Uses a relatable problem, question, or real-world situationWhat Is [Topic]?
Explain the topic in simple language.
Include:
• A clear definition
• The main purpose of the concept
• A simple analogy
• The basic idea behind how it worksAssume the reader has never studied the topic before.
How Does It Work?
Explain the process step by step.
Include:
• The main components
• The basic workflow
• What goes into the system
• What happens during processing
• What output is producedUse a numbered explanation when appropriate.
Practical Examples
Provide at least two practical examples.
For each example, include:
• The problem
• How the concept is applied
• The expected result
• A simple walkthroughInclude beginner-friendly code, prompts, diagrams described in text, or sample inputs and outputs when relevant.
Explain every code example clearly. Do not include code without explaining what it does.
Common Use Cases
Describe at least five realistic use cases.
For each use case, explain:
• The industry or situation
• The problem being solved
• How the topic helps
• The expected benefitUse cases should be practical rather than overly theoretical.
Comparison With Related Concepts
Compare the topic with closely related concepts such as:
[INSERT RELATED CONCEPTS, OR IDENTIFY THEM AUTOMATICALLY]
Use a comparison table containing:
• Concept
• Main purpose
• How it works
• Best suited for
• Key limitationAfter the table, explain when someone should choose each concept.
Do not present related concepts as identical. Clearly explain their differences.
Best Practices
Provide practical best practices for using the topic successfully.
Cover areas such as:
• Planning
• Data or input quality
• Prompt or configuration design
• Testing
• Evaluation
• Security
• Cost
• Performance
• Human review
• Continuous improvementExplain why each best practice matters.
Common Mistakes
Describe the most common beginner mistakes.
For each mistake, include:
• What the mistake is
• Why it happens
• What problem it causes
• How to avoid or fix itInclude at least five mistakes.
Limitations and Considerations
Explain the important limitations of the topic.
Discuss relevant concerns such as:
• Accuracy
• Hallucination
• Bias
• Privacy
• Security
• Cost
• Scalability
• Maintenance
• Dependence on data or toolsKeep this section balanced. Do not exaggerate either the benefits or the risks.
Conclusion
Write a short conclusion that:
• Summarizes the main idea
• Reinforces the most important lessons
• Explains when the topic is useful
• Suggests one practical next step for beginnersDo not introduce new concepts in the conclusion.
Frequently Asked Questions
Write between five and eight FAQs.
Include questions about:
• The basic meaning of the topic
• How it works
• Whether coding is required
• Tools or platforms commonly used
• Costs or limitations
• Beginner learning steps
• Differences from related concepts
• Real-world applicationsKeep each answer clear and concise.
Final Article Validation Checklist
Before submitting the article, verify the following:
Content
• The article has a clear and relevant title.
• The introduction is short and explains why the topic matters.
• The topic is defined in simple language.
• Technical terms are clearly explained.
• A simple analogy is included.
• The working process is explained step by step.
• At least two practical examples are included.
• Examples contain enough explanation for beginners.
• At least five practical use cases are included.
• Related concepts are compared clearly.
• A comparison table is included.
• Best practices are practical and actionable.
• At least five common mistakes are explained.
• Important limitations and risks are discussed.
• The conclusion summarizes the article without adding new information.
• Five to eight FAQs are included.Writing Quality
• The language is simple and beginner-friendly.
• The article avoids unnecessary jargon.
• Paragraphs are short and readable.
• Headings follow a logical order.
• Examples are realistic and relevant.
• Claims are accurate and not exaggerated.
• Repeated information has been removed.
• The article is educational rather than promotional.
• The final article can be understood without external context.Practical Value
• The reader understands what the topic is.
• The reader understands how it works.
• The reader knows where it can be used.
• The reader understands how it differs from related concepts.
• The reader knows the main best practices and mistakes.
• The reader has a clear next step for learning or experimentation.Output only the complete article. Do not include planning notes, hidden reasoning, or comments about how the article was generated.
Step 3: Use the Generated Prompt
Now fill the placeholder:
Topic: AI Agents
And then the output will be generated according to AI agents and the provided prompt.
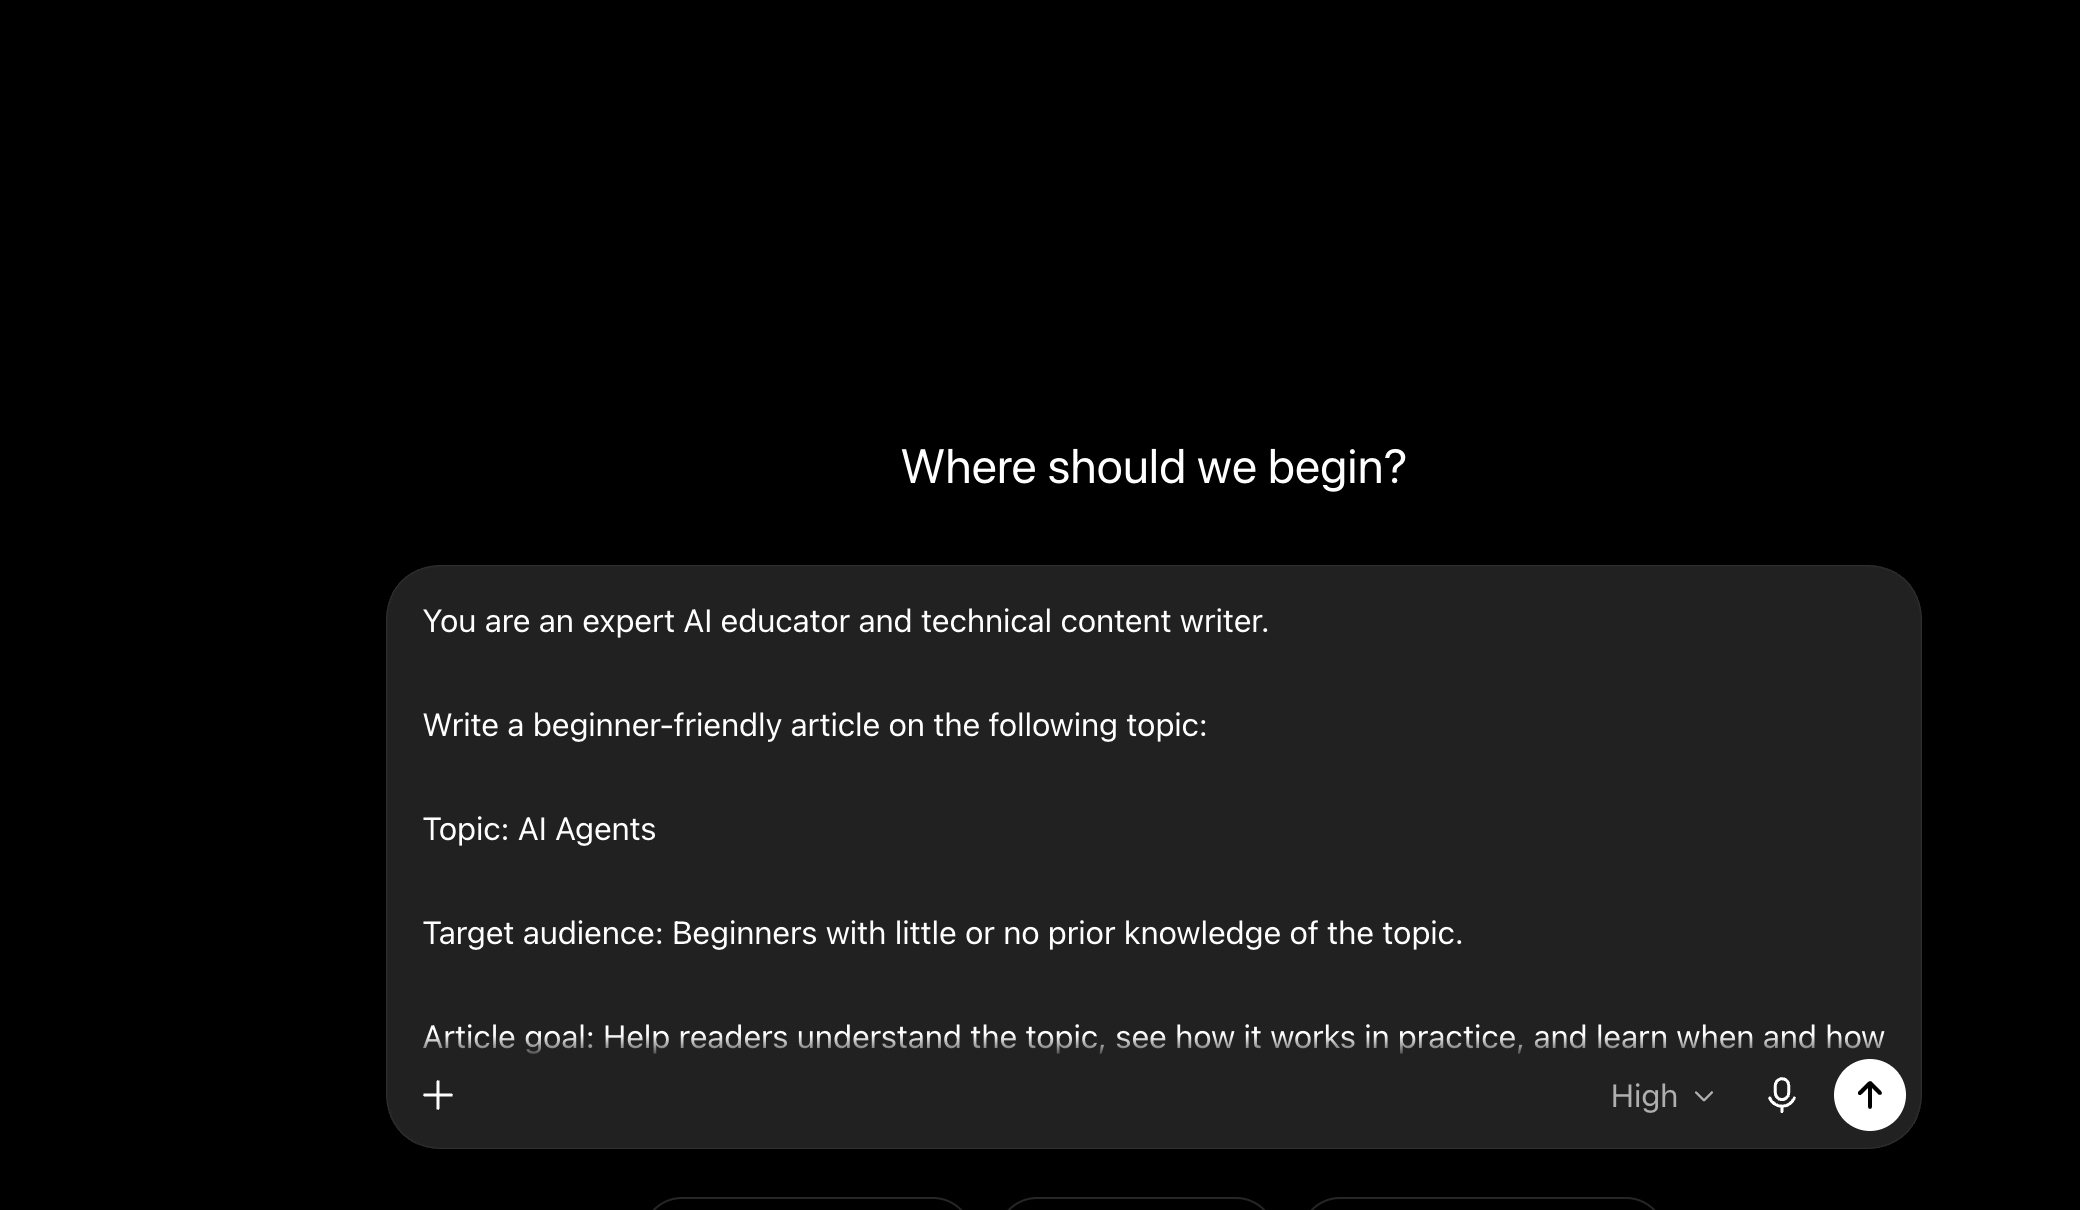

Step 4: Test and Improve
After running this prompt, check the output using the checklist.
If the article feels too generic, add:
Include one workplace example.
Article is too long, add:
Keep each section short and easy to scan.
If the article misses structure, add:
Use proper headings and subheadings.
This is how meta-prompting works in practice. We do not just create one final answer. We create a reusable prompt that can generate many consistent answers across similar tasks.
| Technique | What It Means | Main Focus | Example Prompt | Best Used For |
| Normal Prompting | The user directly asks the model to complete a task. | Getting one final answer. | “Write a LinkedIn post on AI agents.” | Simple, one-time tasks where a direct answer is enough. |
| Few-Shot Prompting | The user gives a few examples and asks the model to follow the same pattern. | Teaching the model through examples. | “Here are three examples of customer summaries. Now summarize this new customer in the same style.” | Tasks where format, tone, or style can be learned from examples. |
| Chain-of-Thought Prompting | The user asks the model to reason step by step before giving the answer. | Improving reasoning for complex problems. | “Solve this problem step by step before giving the final answer.” | Math, logic, planning, analysis, and multi-step reasoning tasks. |
| Meta-Prompting | The user asks the model to create, improve, or control another prompt. | Building a reusable prompt, template, checklist, or workflow. | “Create a reusable prompt that helps an AI model write high-quality LinkedIn posts on AI topics.” | Repeated tasks where consistency, structure, and quality control matter. |
In simple terms, normal prompting gives you one answer. Few-shot prompting shows the model examples to imitate. Chain-of-thought prompting helps the model reason through a task. Meta-prompting goes one level higher and helps design the prompt or workflow that can be reused for many similar tasks.
For example, if you want one LinkedIn post, normal prompting is enough. If you want the post to follow a specific style, few-shot prompting can help. If the post requires deep analysis, chain-of-thought prompting can help structure the reasoning. But if you want a reusable prompt that can generate many LinkedIn posts consistently, meta-prompting is the better choice.
Meta-prompting can be used in different ways depending on the task. Sometimes we use it to create a new prompt, sometimes to improve an existing prompt, and sometimes to design instructions for an AI agent. Here are some common patterns.
| Pattern | What It Does | Example |
| Prompt Generator | Creates a strong prompt from a goal, requirements, and constraints. | “Create a prompt that helps an AI model write beginner-friendly blogs on machine learning.” |
| Prompt Refiner | Improves an existing prompt based on feedback or failure cases. | “Rewrite this prompt so the output is more structured, concise, and consistent.” |
| Template Builder | Creates a reusable prompt with placeholders. | “Create a prompt template with placeholders for topic, audience, tone, and word limit.” |
| Self-Critique Loop | Generates a prompt, checks it against a rubric, and improves it. | “Create a prompt, evaluate it using this checklist, then revise it if needed.” |
| Agent Scaffolding | Creates system instructions or tool-use rules for an AI agent. | “Write instructions for an AI agent that can search, summarize, verify, and respond.” |
These patterns make meta-prompting practical. For example, a content team can use a template builder to create reusable blog prompts. A developer can use a prompt refiner to improve a weak coding prompt. A product team can use agent scaffolding to define how an AI agent should reason, use tools, and return outputs.
The main idea is simple: meta-prompting helps us move from writing one-time prompts to creating reusable prompt systems.
Conclusion
Meta-prompting helps make LLM outputs more structured, consistent, and reusable. Instead of asking the model to complete one task directly, we ask it to create the prompt, template, rules, or checklist that will guide future outputs. This makes it useful for repeated workflows like content creation, coding, customer support, data science, education, and AI agents. It turns prompting into a design process that can be tested, improved, and scaled. However, it still needs a clear goal, strong constraints, real examples, and proper testing. In simple terms, meta-prompting helps us design better instructions for reliable AI workflows.
Frequently Asked Questions
A. Meta-prompting uses one prompt to create, improve, or control another reusable prompt.
A. It improves consistency, scalability, and quality across repeated AI tasks and workflows.
A. Define the goal, add constraints, generate a reusable prompt, then test and refine it.

Hi, I am Janvi, a passionate data science enthusiast currently working at Analytics Vidhya. My journey into the world of data began with a deep curiosity about how we can extract meaningful insights from complex datasets.
Login to continue reading and enjoy expert-curated content.