How to Fine-Tune YOLO26 for Safety Gear and Sign Language Detection
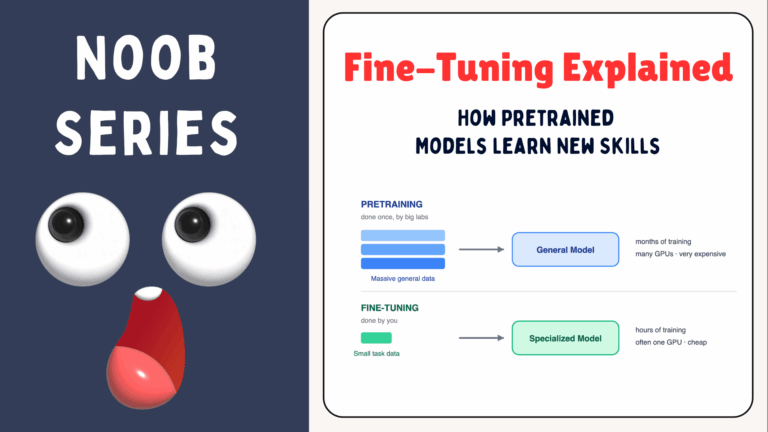
Out of the box, a YOLO model is a generalist. It knows 80 everyday objects and not much else. The real magic, though, comes from teaching it your task. That is what fine-tuning does, and it is far easier than most people expect.
In this guide we fine-tune YOLO26 on two very different real-world problems. First, we build a construction-site safety checker that flags workers missing protective gear such as a hard hat, safety vest, or mask. Then we train a model to read the sign-language alphabet from a hand. The domains could not be more different, yet the workflow is almost identical. That is the whole point: once you learn the recipe, it transfers to almost any detection task.
What you will learn
- How to get a free Roboflow API key and pull a ready-made dataset
- What fine-tuning is, and why a pretrained model alone is not enough
- How to fine-tune YOLO26, evaluate it, and run it on images and video
- How the exact same steps solve two completely different problems
Everything runs on Google Colab, Kaggle, or your own machine, and a GPU is recommended.
Why fine-tune at all?
YOLO26 is pretrained on the COCO dataset, which covers 80 common objects such as a person, a car, or a dog. So on a construction photo, it cheerfully boxes every worker as a person. For a moment that looks helpful. If you want a refresher on what makes this release tick, our guide to YOLO26 NMS-free inference breaks down what changed under the hood.
Then you remember the real question. For safety, it is not “is there a person?” but “is this person wearing a hard hat?” COCO has no class for a hard hat, a vest, or a hand sign. Because that information lives in labels the model never saw, there is no output for it. You cannot prompt your way to it. In short, the task is not a harder version of what the model knows. It is a brand new label space. Fine-tuning keeps the visual skills the model already has and teaches it the new classes on top, using only a small dataset.
Getting set up (do this once)
Both projects start the same way, so here is the shared setup.
Get your free Roboflow API key
Our datasets live on Roboflow, so you need a free key to download them.
- Sign up at roboflow.com (the free plan is plenty).
- Open Settings, then API Keys.
- Copy your Private API Key.
One key works for every dataset, so keep it handy and reuse it in both projects.
Install the libraries
%pip install -q ultralytics roboflow
import ultralytics
ultralytics.checks()
We also pull the test images and videos once, from a public GitHub Release, then look each one up by name. This helper is used in both projects.
import os, glob, urllib.request, zipfile

ASSETS_DIR = "assets"
ASSETS_URL = "

if not glob.glob(os.path.join(ASSETS_DIR, "**", "*"), recursive=True):
    urllib.request.urlretrieve(ASSETS_URL, "Assets.zip")
    zipfile.ZipFile("Assets.zip").extractall(ASSETS_DIR)

def asset(name):
    hits = glob.glob(os.path.join(ASSETS_DIR, "**", name), recursive=True)
    if not hits:
        raise FileNotFoundError(f"'{name}' not found under {ASSETS_DIR}/.")
    return hits[0]
With that in place, let us build the first detector.
Project 1: Construction Site Safety (PPE Detection)
Personal protective equipment, or PPE, is the gear that keeps workers safe: hard hats, safety vests, masks, and more. Construction is one of the most dangerous industries on the planet. In the United States alone, the sector accounts for roughly one in five workplace deaths each year (OSHA). Many of those injuries are preventable with gear the worker already owns, such as a hard hat left in the truck. The hard part was never the equipment. It was enforcement at scale. A safety officer can watch one gate, but a busy site has many. An automated camera never gets tired and never looks away.
Download the dataset
We use the Construction Site Safety dataset from Roboflow. It arrives in YOLO format with about 2,800 images and 10 classes. Crucially, it pairs positives with negatives: Hardhat and NO-Hardhat, Safety Vest and NO-Safety Vest. That pairing is what makes compliance detection possible.
from roboflow import Roboflow

API_KEY = "PASTE_YOUR_ROBOFLOW_KEY"        # from roboflow.com -> Settings -> API Keys

rf = Roboflow(api_key=API_KEY)
ds = rf.workspace("roboflow-universe-projects").project("construction-site-safety").version(27).download("yolov8")
DATA_YAML = os.path.join(ds.location, "data.yaml")
See the base model fail first
Before training, let us prove the point. We run the stock model on a site image full of workers.
import matplotlib.pyplot as plt
from ultralytics import YOLO

base = YOLO("yolo26n.pt")
r = base.predict(asset("yolo26_Finetuning_image_PPE_hardhat_workers.jpg"), conf=0.25, verbose=False)[0]
plt.imshow(r.plot()[:, :, ::-1]); plt.axis("off"); plt.show()
The result is telling. You get clean person boxes and nothing else. A worker can be wearing a bright hard hat, yet the model has no label for it. So its score on the safety classes is effectively zero. That is the honest “before” picture.
Fine-tune YOLO26
Now the main event. We start from the pretrained yolo26n.pt checkpoint and teach it the safety classes.
from pathlib import Path
model = YOLO("yolo26n.pt")
model.train(data=DATA_YAML, epochs=100, imgsz=640, batch=16, patience=20,
            project="runs_yolo26", name="ppe_finetune", exist_ok=True)
SAVE_DIR = Path(model.trainer.save_dir)
Starting from yolo26n.pt is what makes this fine-tuning rather than training from scratch. Also, imgsz=640 keeps small objects like hard hats readable, and patience=20 stops early to avoid overfitting. On a free Colab GPU this takes only a few minutes.
Evaluate and test on images
After validating with model.val(), we run the fine-tuned model on three test images: a compliant crew, a no-hard-hat violation, and a busy site with vests and machinery.
best = YOLO(SAVE_DIR / "weights" / "best.pt")
imgs = [asset(n) for n in [
    "yolo26_Finetuning_image_PPE_hardhat_workers.jpg",
    "yolo26_Finetuning_image_PPE_no_hardhat.jpg",
    "yolo26_Finetuning_image_PPE_vest_and_machinery.jpg",
]]
preds = best.predict(imgs, conf=0.25, verbose=False)

The change is night and day. The base model only knew “person,” but the fine-tuned model now boxes Hardhat, Safety Vest, Person, and the machinery with solid confidence. It is not flawless: in the busy frame it tags a worker in a white hard hat as NO-Hardhat at a shaky 0.38, a good reminder that the negative classes are the hardest and that a pale helmet on a pale background is easy to misread. Even so, the same model family that was blind a minute ago now reads most of the safety scene, which tells us the fine-tune genuinely worked.
Real-time video with a safety alert
Boxes are useful, but an alert is what a site actually needs. Here we run on a video and flash a red banner whenever any NO-* class appears.
import cv2
best = YOLO(SAVE_DIR / "weights" / "best.pt")
NAMES = best.names
VIOLATION = [n for n in NAMES.values() if str(n).upper().startswith("NO-")]

cap = cv2.VideoCapture(asset("yolo26_Finetuning_video_PPE_man_phone.mp4"))
fps = cap.get(cv2.CAP_PROP_FPS) or 25
W, writer = 1280, None
while True:
    ok, frame = cap.read()
    if not ok: break
    frame = cv2.resize(frame, (W, int(W * frame.shape[0] / frame.shape[1])))
    r = best.predict(frame, conf=0.25, verbose=False)[0]
    ann = r.plot()
    labs = [NAMES[int(c)] for c in r.boxes.cls.tolist()] if (r.boxes is not None and len(r.boxes)) else []
    if any(l in VIOLATION for l in labs):
        cv2.rectangle(ann, (0, 0), (ann.shape[1], 55), (0, 0, 255), -1)
        cv2.putText(ann, "SAFETY VIOLATION", (20, 40), cv2.FONT_HERSHEY_SIMPLEX, 1.2, (255, 255, 255), 3, cv2.LINE_AA)
    if writer is None:
        h2, w2 = ann.shape[:2]
        writer = cv2.VideoWriter("ppe_annotated.mp4", cv2.VideoWriter_fourcc(*"mp4v"), fps, (w2, h2))
    writer.write(ann)
cap.release(); writer.release()
Frame after frame the detection holds steady, and the red SAFETY VIOLATION banner fires the instant the model flags a missing mask (NO-Mask) on the worker. The same rule covers every negative class, so a missing hard hat or vest would trip it just the same. That is the core of a real monitoring tool, in a few lines.
Pushing it: a full construction site
Clean, single-subject shots are a warm-up. A real site is messy, with several workers at once, cones, machinery, and vehicles all crowded into one frame. So let us run the same model on a complete scene packed with objects.
This is where it counts, and the model holds up well. It picks out person after person, tags hard hats and vests as it goes, and still watches the machinery. A few detections wobble on the most distant, cluttered figures, which is honest and expected. Even so, the overall read of the scene is strong, and the violation logic keeps working in the crowd.
Did Project 1 fine-tune correctly?
Yes. The base model could only see a generic person, while the fine-tuned model now detects every PPE class with good confidence and flags violations on its own. That said, it helps to be honest about the rough edges. The NO-* classes are the hardest, because the model must assert that gear is absent, so they misfire more than the rest. On a busy frame you will see the occasional wrong label, and a worker in a vest can sometimes read as NO-Safety Vest. None of that breaks the result. It simply reflects a small dataset and the genuine difficulty of negative classes. For a tutorial and a working prototype, the model performs exactly as it should.
Project 2: Reading Sign Language (ASL A-Z)
Now we point the very same recipe at a completely different problem. Sign language is how millions of people communicate, and a tool that reads fingerspelling from a camera is a real accessibility aid. For someone who is deaf or unable to speak, this can be a real difference maker: a system that reads signs in real time helps bridge the gap with people who do not know sign language, making everyday conversation easier in both directions. Watch how little of the workflow actually changes.
Download the dataset
We use the American Sign Language (ASL) Letters dataset from Roboflow, which has 26 classes, one per letter, already in YOLO format.
ds = rf.workspace("david-lee-d0rhs").project("american-sign-language-letters").version(6).download("yolov8")
DATA_YAML = os.path.join(ds.location, "data.yaml")
The base model knows no letters
A quick check confirms the obvious. The stock model finds no letter on a clear hand image.
base = YOLO("yolo26n.pt")
img = asset("yolo26_Finetuning_image_ASL_B.jpg")
r = base.predict(img, conf=0.25, verbose=False)[0]
detected = [base.names[int(c)] for c in r.boxes.cls.tolist()] if (r.boxes is not None and len(r.boxes)) else []
print("Base model detected:", detected or "nothing useful (no letter)")
Fine-tune and evaluate
The training call is the same as before, just pointed at the ASL data and a smaller image size, since these are close-up shots of one hand.
model = YOLO("yolo26n.pt")
model.train(data=DATA_YAML, epochs=100, imgsz=416, batch=16, patience=20,
            project="runs_yolo26", name="asl_finetune", exist_ok=True)
SAVE_DIR = Path(model.trainer.save_dir)
metrics = model.val()
When you read the confusion matrix, watch the look-alike clusters. The letters U, V, and F all use two raised fingers, while A, S, M, N, and T are all closed-fist shapes. Those groups are where most errors live.
Test on images
We run the fine-tuned model on four letters: O, B, H, and U.
best = YOLO(SAVE_DIR / "weights" / "best.pt")
imgs = [asset(n) for n in [
    "yolo26_Finetuning_image_ASL_O.jpg",
    "yolo26_Finetuning_image_ASL_B.jpg",
    "yolo26_Finetuning_image_ASL_H.jpg",
    "yolo26_Finetuning_image_ASL_U.jpg",
]]
preds = best.predict(imgs, conf=0.25, verbose=False)

The model clearly learned the alphabet. The flat palm reads as B with high confidence, and O, H, and U come through too. Every correct box here is new knowledge, since the base model could not name a single letter moments ago. The confidence on the trickier two-finger letters sits lower, which is a useful, honest hint about which signs the model finds hard.
Read letters from video
Finally, we run the model frame by frame on a gesture clip and print the detected letter.
best = YOLO(SAVE_DIR / "weights" / "best.pt")
NAMES = best.names
cap = cv2.VideoCapture(asset("yolo26_Finetuning_video_ASL_gestures.mp4"))
fps = cap.get(cv2.CAP_PROP_FPS) or 25
W, writer = 1280, None
while True:
    ok, frame = cap.read()
    if not ok: break
    frame = cv2.resize(frame, (W, int(W * frame.shape[0] / frame.shape[1])))
    r = best.predict(frame, conf=0.25, verbose=False)[0]
    ann = r.plot()
    letter = None
    if r.boxes is not None and len(r.boxes):
        top = int(r.boxes.conf.argmax()); letter = NAMES[int(r.boxes.cls[top])]
    cv2.putText(ann, f"Letter: {letter or '-'}", (20, 48), cv2.FONT_HERSHEY_SIMPLEX, 1.1, (0, 255, 255), 2, cv2.LINE_AA)
    if writer is None:
        h2, w2 = ann.shape[:2]
        writer = cv2.VideoWriter("asl_annotated.mp4", cv2.VideoWriter_fourcc(*"mp4v"), fps, (w2, h2))
    writer.write(ann)
cap.release(); writer.release()
The model tracks the hand smoothly and names each sign as it changes. You will notice two honest hiccups: the label flickers in the moments between signs when the hand is mid-transition, and the letter O drops out now and then toward the end. Both are normal for a per-frame classifier on continuous video, where a rounded shape like O is easy to lose at certain angles. Holding each letter a little longer cleans most of it up.
Did Project 2 fine-tune correctly?
Mostly yes, with an honest asterisk. The model learned all 26 letter classes and reads clear, well-held signs with good confidence. Against a base model that knew nothing, that is a clear win. The asterisk is the look-alike problem. ASL packs several letters into very similar shapes, so the model swaps them more than you would like, and an oddly angled hand can read as the wrong letter. The dataset is also small and fairly uniform, which makes it brittle on new backgrounds. So this is a strong demo and a fun project, not a production translator.
From idea to working model to real-time deployment
Big Vision takes computer vision projects through the full journey, not just the easy parts.
What we learned
Across two very different problems, you used the exact same five steps: get a Roboflow key, pull a YOLO-format dataset, start from a pretrained checkpoint, train for a few minutes, then test on images and video. The construction model now enforces hard-hat rules, and the sign-language model reads the alphabet. Neither task was in YOLO26’s original vocabulary.
That is the real takeaway. The domain changed completely, but the recipe did not. Whatever you want to detect next, a defect on a production line, an animal in a camera trap, a tumor on a scan, the path is the same one you just followed twice. And when you are ready to take a model from a notebook to production, our walkthrough on real-time YOLO26 deployment shows the next step.
Useful links
Was This Article Helpful?